Welcome

A place for random posts about painting and modelling miniatures for historical, fantasy, and science fiction tabletop games.

Sunday, March 22, 2015

Sword & Wizardry vs. The Barrowmaze - Sessions 1 to 3


Sword & Wizardry vs. The Barrowmaze - Sessions I to III
"Funny thing happened to me on the way to the dungeon"


So as mentioned before I am running my long time gaming group through Barrowmaze, I decided to use the Sword & Wizardry Complete as the base rule set. Here is a brief summary of the gaming sessions so far.

First Session

I had all of my players roll up three different PC's.

Everyone had a laminated hero builder sheet so they could wipe them clean and reuse them to make creating the PC's faster and easier.

DM Note: The sheets were a lot of fun to make and the players liked them, but it did not help as much as I thought they would

As part of the PC generation process, Each PC was given a random Background, Dark Secret, a Physical and Mental Trait. This was done as a challenge to the players to incorporate these into a cohesive background..

Then we put all of the PC's into a folder and then I randomly gave each player a PC from the folder.
Everyone managed to get a PC that someone else created, needless to say much fun and hilarity ensued.

Side Note: The one lone female characters is played by a guy and all the female players ended up with male characters.

In the event of a PC dying, the player gets a new random character from the "Fresh Meat" Folder


Second Session

We finally started the campaign, "Yay", the party has been travelling to the Duchy of Aerik for weeks and finally arrived in the village of Helix.

It is at this point that I shall introduce the party.

  • JarvisHuman Cleric of Herne, also known as Jarvis the Shitty Tailor
  • Splendiferous FinchHalf-Elf Fighter/Magic-User, known for having fantastic hair
  • Rosco ColtraneHuman Fighter
  • Ehith SplinterraElven Magic-User, 1,400 year old elven 1st level wizard
  • RidleyHuman Fighter, Busty Young Female Fighter, Apple of Jarvis's Eye
  • Sir Grunky PeepsHuman Fighter, A nobleman and very loud talker, likes to refer to himself in the 3rd person.
The players then proceeded to spend the entire session exploring the village, meeting the locales, drinking, eating and shopping. It was a heavy role-play session with a lot of funny moments and the party avoiding every one of the minor plot hooks l had laid, so no side adventures for now.

Funniest Moment: The 1,400 year old elf poking at a 300 pound harlot yelling "back you foul beast, back to your cage". There is more to the story, but you had to be there. 

I let the players fumble around and figure things out on their own. To be honest, the person who had the hardest time with this was me, the DM. I have never ran a pure sandbox / megadungeon adventure like Barrowmaze before. I had to learn to keep a hands off approach and let the PC's do their thing.


Third Session

We started the session off with two players not being able to attend, but we picked up a  new player.

Rosco was stricken by Montezuma's revenge and Grunky ended up deciding to stay in town to continue to gather information about the area and the burial mounds.

The rest of the party headed out at dawn to find the Barrowmaze. They had just hired a local guide named Bartik and teamed up with a Paladin of Horus, named Al-Jazeera, who had recently arrived in the village and was looking for a party to join.

The morning was spent traversing the Barrowmoors. A couple of hours into the journey the party was surprised by 3 Skeletons who were aimlessly wandering the moors. Ehith was killed when one of the skeletons cleaved his head open. In addition, Ridley was knocked out by one of the skeletons, but the party bounced back, Splendiferous destroyed one with Magic Missile and Jarvis was able to turn the dead back by invoking the name of Herne. He expended a precious Cure Light Wounds to restore Ridley to full health.

The party then proceeded to loot Ehith's body and bury* him in the moors. Shortly after they ran into a halfling named Shy Longleaf, an adventurer who had become separated from his party when they were attacked by the undead on the moors.

By Noon the party had finally arrived at the burial mounds of the Barrowmaze. They began to explore and came across a mound whose entrance had been covered. Luckily Al-Jazeera had a couple of shovels with him. They spent the next several hours digging out the entrance.

Just as they opened the door to the mound a party of 6 Froglings came out of the moors and approached the party in a non-hostile but wary manner. Al-Jazeera stepped forward to parlay with them, however not knowing their language, he accidentally issued a challenge to combat to the death with the strongests frogling.

DM: What do you say to the Froglings?
Al-Jazeera: I raise my arms in the air and yell "BUD-WISE-URRRR"
DM: ............. OK, they raise their arms and bellow back  BUD-WISE-URRRR, the biggest and strongest of the frogling draws his weapon and points at you in a challenging manner.

Needless to say the Paladin won and the froglings took their champion and returned to the moors, no doubt to plot their revenge on the Paladin.

Meanwhile Jarvis, whose DARK SECRET was a fear of slimes and slimy creatures panicked and fled down into the burial mound. The halfling Shy, ran after him. They managed down to descend the stairs without falling and found themselves in a dark room. Neither of them could see in the dark and neither had bothered to light a torch.

DM Note: In Sword & Wizardry, Halflings do not have darkvision or infravision.

Which was unfortunate since they could not see the 6 Giant Centipedes on the ceiling. The centipedes dropped onto Jarvis and Shy biting them repeatedly. Jarvis failed his saving throw and succumbed to the poison bite. Shy passed his saving throw. The rest of the party could hear that they were in trouble, lit a torch and charged down the stairs.They slew all of the centipedes and tried to save Jarvis but it was too late. They then looted the tomb and Tarvis.

They then carried Jarvis's body outside and buried him in the moors. It was during the burial that a female dwarf named Ivana Humpalot, appeared. She had been in the same party as Shy, there was great rejoicing at being reunited.

The  day was getting late and Bartik warned the party of travelling the moors at night, the party decided to used the burial mound as a camp. After setting up their camp they did a little more exploring and discovered a monument to Nergal, the deceased Greater God of Death. They returned back to their camp and were promptly attacked by 5 Pterodactyls.

DM Note: There are no stats for Pterodactyls in Barrowmaze, Sword & Wizardry Complete, Labyrinth Lord or LL AEC. I had to make some shit up on the fly. I have since done some research and found the stats for some in OSRIC. I have created a version for S&W
Pterodactyls (Sword & Wizardry Version)
Hit Dice: 1+2
Armor Class: 8 [12]
Attacks: 2 claws (1d4) or 1 bite (1d6)
Saving Throw: 17
Special: None
Move: 24/48 (flying)
Alignment: Neutral
Challenge Level/XP: 2/40
Ptreodactyles are winged cold-blooded reptiles. They swoop down and pick up their prey. They then drop them on rocks to kill and then eat them.

They managed to evade attack and escaped back to their camp with only the torchbearer almost getting grabbed if not for the fast actions of the halfling and paladin. After a full nights rest and with no monsters bothering them they set out to explore again in the morning

TO BE CONTINUED.......


.


Friday, February 6, 2015

Sword & Wizardry vs. The Barrowmaze: The Planning Stages

Sword & Wizardry vs. The Barrowmaze: The Planning Stages

My long time gaming group had recently started to get into 5th Edition D&D when my buddy who was DMing had to bow out. My group has been also playing in my wife's Werewolf the Apocalypse game, but they still wanted to play a fantasy game.

So I volunteered to run something that I have been dying to DM, Greg Gillespie's Barrowmaze.

Even better I supported the Indiegogo Barrowmaze Complete


I have never run Sword & Wizardry before but ever since I got my copy of the Complete Sword & Wizardry In have been itching to give it a go. Barrowmaze was designed for the Labyrinth Lord RPG which is a retroclone of B/X and 1st Ed AD&D, so I need to tweak a few things but not much.

The House Rules

Character Creation

All of my players are going to need to roll up three complete Player Characters.

They pick which one they start with. The other two go into the Fresh Meat Folder

Fresh Meat -  If a PC dies and is not resurrected, player draws a random PC from Fresh Meat

Abilities - Roll 4d6 drop the Lowest (Median: 12)
  • Strength - Non-Fighters can get a +1 to Hit and +1 Damage if STR 13+
  • Intelligence - Magic-Users with Int 15+ gain an extra 1st Spell Slot at 1st level
  • Wisdom - Clerics & Druids with Wis 15+ gain an extra 1st Spell Slot at 1st level

Races
  • Added Half-Orc Player Race from The Lost City of Barakus (S&W)

Classes

  • Monks: has 2d4 Hit Dice at 1st Level (from LL-AEC) & Must be Lawful Good or Lawful Evil
  • Thief: Use D20 System for Thief Skills (from ACKS)
  • Clerics: Must be Lawful Good or Lawful Evil 

Alignment - Five Point System (Holmes)

  • Lawful Good
  • Chaotic Good
  • Neutral
  • Chaotic Evil
  • Lawful Evil

Equipment

  • Imported some items and prices from LL

Time

  • 1 Turn (10 Minutes) > 1 Combat Round (1 Minute) > 1 Segment (6 Seconds)

Combat Sequence: 

  • Fighting Withdrawl & Retreat Declare before Intitiative
  • 2nd Missile shot at end of Sequence
  • Morale Roll at end of Sequence
  • Descending AC used
  • D12 Critical Hit & Fumble Rules in effect
  • Attack of Opportunity 

Player & GM Aids

I decided to create some aids for myself and my players

Since none of them have ever played S&W and I created some things to help them out


Tuesday, August 26, 2014

Work, School, Work, School

Work,

School

Swamp People

Work

School

Homework

I got over a dozen miniatures almost finished

Need to find time

Finally got my Frog God Kickstarter and the Lost City of Barakus.

Avoiding Dragon Con this year, no time or money

Reaper Kickstarter and Robotech Kickstarter coming soon.


Monday, August 11, 2014

Hot Music and Old Lead

The Silence is Deafening.......


I hate painting in silence, I have to something on in the background, be it the TV or the Radio.

Back when I was painting 15mm historicals for pocket money and before cheap MP3 players I use to load up my 5 disc CD player and rock out while I painted.

Since I have gotten back into the groove of painting I have leafing though my old CD's and putting together some painting music.

My Painting Playlist


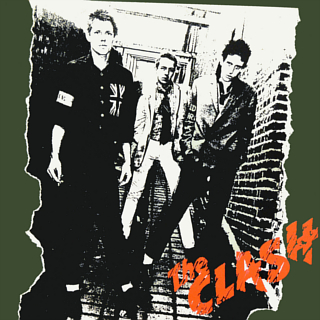
The Clash (1979 US version) - London Calling is often the favorite of fans and critics, but the first Clash Album for me is one of the best albums by the Clash. The US version had "(White Man) In Hammersmith Palais" and "I Fought the Law" which the UK version did not.


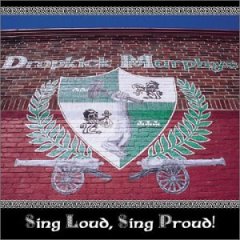
Sing Loud, Sing Proud! - My first introduction to the Dropkick Murphys and still my favorite. Great cover of Florence Reece's "Which Side Are You On?" and "The Rocky Road to Dublin"


Walk Among Us  - The Misfits Album, Nuff Said. Great stuff to listen to when painting really evil shit.


Wave of Mutilation: Best of Pixies - Great Compilation of all my favorite Pixie's Songs. Great stuff to listen too when painting Chaos. ;)


Hell Yeah - I enjoy rockabilly and psychobilly and I always thought that this was a great example of the genre. Horrorpops were a great band and I wish they were still around.


Monday, July 21, 2014

WHFB CAMPAIGN: FEAR & LOATHING IN THE LAND OF MILK & HONEY

Or How I Learned to Stop Worrying and Love the Mutation

This is a rough draft of my idea for a Narrative Campaign for Warhammer Fantasy Battle 3rd Edition.
BACKGROUND
On the edge of the civilized lands lies a secluded valley that bestrides the well-ordered lands of men and the howling wilderness of chaos.  A frothing ribbon of whitewater divides the valley in half and is the demarcation line between the settled lands and the wilderness. For centuries the forces of Order and Chaos have fought over the valley in a never ending struggle.
There are two major settlements in the valley, one a wellspring of light, the other a sinkhole of chaos. Each is a beacon calling out to the followers of Good and Evil to come and do battle.
A TOWN CALLED HOPE
This fortified town is located in the West Bank and has been the rallying point of all good folk for as long as anyone can remember. The town is ruled by the Council of Captains and protected by the well-trained, well equipped Company of the White Lion.

Elf archers, dwarf axe men, halflings cooks, and human fighters walk around its streets. Many join up to form Free Companies to go and do battle against the forces raiding out of Fort Doom or attempt to drive out the monsters from the countryside. This is the starting point of all Free Companies.
THE GRIM DARK FORTRESS OF DOOM  
This mighty fortress is located in the Outer Banks and has survived storm and siege for hundreds of years. Thousands of goblinoids, cultists, beastmen, ratmen and demons have marched through its gate. Currently it is ruled by the Dreadful Lord Penny, a Champion of Chaos. All kinds of evil beings, living and undead, can be found here. Often they will come together to form War Parties to raid the West Bank.
CAMPAIGN MAP


MAP KEY SCENARIOS
A. Crone’s Tower – A trio of crazed witches and their minions are terrorizing local farmers. Rumors are that they have accumulated a great trove of treasure.
B. Dragon’s Den – A black dragon has come to the valley and brought his treasure horde with him. He has been attacking both factions in the valley.
C. High Bridge – Fortified bridge controlled by the forces of Hope
D. Troll Bridge – River crossing currently controlled by the Troll Brothers Bud, Weiss, & Serr
E. Hydra Swamp – A fearsome hydra and other fearsome creatures inhibit this swamp.
F. Low Bridge - Fortified bridge controlled by the forces of Hope
G. The Beastly Hills - Fortified bridge controlled by the forces of Doom.

CAMPAIGN TURN

1. Each Player secretly writes down which mission they want to attempt and gives to the GM.
2. GM Resolve order of actions
3. Players Play Scenario
4. GM Calculates and Distributes Victory Points
5. Players Update there Warband Roster
6. New Turn, Repeat Step 1 

Mission Table


ID
Name
Object
Min1 Pts
Max 2 Pts
A
Which Witch
Attempt to capture or kill one of the witches of the Crone Tower
200
500
B.
Dragon Slayers
Attempt to kill the Black Dragon Naranoth and steal his treasure
200
750
C
Capture the Bridge
Attempt to capture and hold an heavily fortified  Enemy Bridge
300
U3
D
Troll
Bridge
Attempt to slay the Trolls and capturing their bridge.
300
600
E
Swamp
Hunt
Hunting dangerous monsters in the Hydra Swamps for glory and money
200
600
F
Beast
Hunt
Hunting dangerous monsters in the Beastly for glory and money
200
600
G
Raid (Supply)
Launch an raid into enemy territory to attack supply caravan and store houses
200
600
H
Raid (Rescue)
Launch an raid into enemy territory to attack an enemy prison camp
200
600
*
Ambush
Attempt to bushwhack an enemy Warband traveling in your territory
300
600
The End Game Scenario
I
Scout
Scout the enemy position in preparation of Invasion
Requires: Control of Bridge
600
1,000
II
Attack
Launch a full scale invasion of the enemies territory
Requires: Successful Scout Mission previous Turn
Requires: Baggage Train
1,200
U
III
Siege
Besiege the enemies home base
Requires: Successful Attack Mission previous turn
Requires: Baggage Train
2,000
U

1. Minimum Army Size to attempt mission
2. Maximum Army Size to attempt mission
3. U = No Point Limit

Campaign Turn Rules

1. You can only selection missions in enemy territory if your side controls a river crossing. If the enemy controls all of the crossings then only Seize the Bridge and Local Missions can be selected

2. If 2 Warbands from opposing sides both chose the same mission (A, B, D, E or F), The Warband with Home Field Advantage can opt to Ambush the other Warband.
2a. Home Field Advantage: The Mission Objective lies within your territory.
2b. Roll 1d6: 1-3 Ambush is in Route, 4-6 Ambush at Objective Destination

3. If player(s) from one side selects The End Game Scenario, then opposing side must be the defender of that mission.

4. If one player selects the Seize the Bridge, Raid (Supply), the opposing player can use his one Warband or use an NPC force.

5. If 2+ Warbands from the same side chose mission A, B, D, E or F, they can combine forces, but are not required too.

General House Rules                                                                                                

1. Skirmished Units are not affected by Animosity and do not cause Animosity.

2. Heroes can only inflict hits and wounds with models they are in base-to-base contact with.

3. Cannons only inflict 1 Hit per Rank

4. Catapults (All Types) Center Hole does damage at Full Strength, anywhere else on template is ½ Strength.

5. Models who fall in combat will need to roll on the Dead or Not Dead table after the end of the battle.

Dead or Not Dead

Roll 1d12
Rank & File
Heroes
War Machine
1 - 6
Just A Flesh Wound
Just A Flesh Wound
Just a Nick
7
Wounded
8
9
Captured
Wounded
Broke
10
11
Dead
Captured
Wrecked
12
Dead
Destroyed

  • Just a Flesh Wound /Nick – The model is ready to fight in the next Campaign Turn
  • Wounded/Broke – The model will miss the next Campaign turn and counts against your Points Total
  • Captured – The model is in an enemy camp, no longer counts against your points total, if rescued it will count towards your Army Total again.
  • Wrecked – The model is destroyed but the crew is alive
  • Dead /Destroyed – The model is dead or destroyed and will need to be replaced


Hero Captured or Killed

If a Warband’s Leader is captured or killed and they are the only hero In the Warband then the Warband will break apart and go their separate ways.

If there is another hero in the Warband he can take command and becomes the new warband leader.

Saturday, July 19, 2014

Some Finished Models

As the Summer Semester draws to an end, I have returned to the paint desk to pick up the paint brush again and start painting some miniatures again. If I am really lucky maybe in the next few weeks I might get a game of Oldhammer.

Reaper Bone Flesh Golem 


From Left to Right: 
Clan War Fire Shugenja
Reaper Bones Goldar, Male Barbarian
Ral Partha Female Human Form Greater Wolfwere


From Left to Right
Reaper Bones Treasure Pile
Reaper Bones Mocking Beast 
Citadel Wood Elf Beastmaster Bear


From Left to Right (1997 Citadel)
Wood Elf Archer 5
Wood Elf Archer 1
Wood Elf Archer 7
Wood Elf Archer 2


Thursday, July 17, 2014

Free Companies and War Parties - Part 2


Summary

After some feedback from others I revamped the Warbands Rules. These rules are a way to run small groups of miniatures for WHFB.

Here is a PDF copy of the Warband Rules: Warband Rules PDF

Changes 


One of the biggest changes was to how player's grow there warbands. I came up with two different methods.

Reinforcing your Warband   


As each Warband marches out to do battle and go adventuring, they will take losses, gain experience and rewards. There are two methods for reinforcing and upgrading your Warband.

The two method provide two very different gaming experiences


Method One: Direct Buy 


Models can be purchased with Victory Points earned in battle. Models can be selected from the Warbands Parent List, its Ally List or from a Mercenary List


Level Up Hero


  • Raise the level of One Hero up to the Next Step 
    • Cost: 50 VP + Point Difference Between Old Level and New Level


Add Heroes


  • 1x Wizard / Shaman (L. 5) 
    • Cost: 100 VP + Total Cost of Her
  • 1x Sergeant / Sub War Chief (L. 10) 
    • Cost: 75 VP + Total Cost of Hero
  • 2x Corporal / Senior Warrior (L. 5)
    • Cost: 50 VP + Total Cost of Hero

Add Rank & File


  • Add 3 Cavalry Models 
    • Cost: 50 VP + Total Cost of the Troops
  • Add 10 Infantry Models 
    • Cost: 50 VP + Total Cost of the Troops
  • Add 1 Standard Bearer 
    • Cost: 50 VP + Total Cost of the Bearer
  • Add 1 Musician 
    • Cost: 50 VP + Total Cost of the Musician

Add War Machines & Beasts

  • Add 1 Chariot 
    • Cost: 75 VP + Total Cost of the Chariot
  • Add 1 War Machine + Crew 
    • Cost: 75 VP + Total Cost of the Chariot
  • Add 1 Ethereal Host 
    • Cost: 200 VP + Total Cost of the Host
  • Add 1 Creature Host (Warhounds, Giant Rats, Giant Bats, etc.)
    • Cost: 100 VP + Total Cost of the Host
  • Add 1 Giant Size Model (Trolls, Giants, Centaurs, Hydras, Etc.)
    • Cost: 100 VP + Total Cost of the Model

Method Two: Random Recruitment

Players get one free roll on the Rank & File Chart at the beginning of ever Campaign Turn except the 1st Turn. Each additional Roll on the Rank & File or Hero Chart costs 100 VP.

The player must pay VP for the Total Point Cost of the Models.

Rank & File Chart (Good)

Hero & Wizard Chart (Good)
Roll
No.
Type

Roll
Type
1

Dwarfs

1
Dwarfs
2-3
1d3
Ironbreakers

2
Wizard L. 5
4-5
1d4
Crossbowmen

3-8
Hero L. 5
6-9
1d6
Warriors

9-10
Hero L. 10
10-11
1
Sappers

11-12
Hero L. 15
12
1
Cannon

2
High Elves
2

High Elves

2-4
Wizard L. 5
2
1d3
Silver Helms

5-8
Hero L. 5
3-7
1d6
Warrior Kindred

9-10
Hero L. 10
8-10
1d6
Archers

11-12
Hero L. 15
11-12
1d6
Merchant Company

3
Wood Elf
3

Wood Elf

2-4
Wizard L. 5
2-4
1d4
Warrior Kinband

5-8
Hero L. 5
5-6
1d3
Lord Bowmen

9-10
Hero L. 10
7
1d4
Wardancers

11-12
Hero L. 15
8-10
1d6
Archers

4
Imperial
11-12
1d4
Glade Runners

2-8
Hero L. 5
4

Imperial

9-10
Hero L. 10
2-8
1d8
Infantry

11-12
Wizard L. 5
9-10
1d4
Border Horse

5
Halflings
11-12
1d4
Kislevites

2-10
Hero L. 5
5

Halflings

11-12
Hero L. 10
2-10
1d8
Militia

6
Ogres
11-12
1d6
Scouts

2-12
Hero L.10
6

Ogres

7
Nippon
2-12
1
Mercenaries

2-4
Hero L. 5
7

Nippon

5-6
Hero L. 10
2-4
1d4
Samurai

7-12
Wizard L. 5
5-6
1
Ninja

8
Norse
7-12
1d8
Ashigaru

2-8
Hero L. 5
8

Norse

9-10
Hero L. 10
2-8
1d8
Warriors

11-12
Hero L. 15
9-10
1d4
Berserker

9-10
Level Up
11
1d3
Ulfwrenar

1-4
Level Up Leader
12
1d3
Dwarf Troll Slayer

5-6
Level Up Sub-leader


Rank & File Chart (Evil)

Hero & Wizard Chart (Evil)
Roll
No.
Type

Roll
Type
1

Chaos

1
Chaos
2
1d3
Chaos Warriors

1
Sorcerer  L. 5
3
1
Minotaur

2-4
Champion  L. 5
4-5
1d6
Beastmen

5
Champion  L. 10
6
1d2
Centaurs

6
Knight L. 15
7-8
1d6
Goblins

2
Dark Elves
9
1d3
Dwarf Berserker

1
Wizard L. 5
10-11
1d6
Dwarfs

2-3
Hero L. 5
12
1
Dwarf Mortar

5
Hero L. 10
2

Fimir

6
Hero L. 15
2-6
1d3
Fianna Fimm

3
Fimir
7-12
1d6
Fimm Warrior

1
Dirach Wizard
3

Orc & Goblin

2-5
Fimm Warlord
2-4
1d3
Bigguns

6
Meargh Wizard
5-6
1d4
Arrer Boyz

4
Orc & Goblin
7-9
1d6
Boyz

1
Orc Hero L. 5
10-12
1d8
Gobbos

2
Goblin Hero L. 5
4

Dark Elves

3
Orc Hero L. 10
2-3
1d2
Doomdrakes

4
Goblin Hero L. 10
4-8
1d4
Warriors

5
Orc Shaman L. 5
9-10
1d3
Doomsteads

6
Goblin L. 5
11-12
1d3
Witch Elves

5
Skaven
5

Skaven

1
Seer  L. 5
2-7
1d8
Clanrat Warrior

2-4
Hero  L. 5
8-9
1d3
Gutter Runner

5
Hero  L. 10
10
1d2
Plague Censer Bearers

6
Hero L. 15
11
1d2
Plague Monks

6
Undead
12
1
Flamethrower Team

1
Necromancer L. 10
6

Undead

2
Necromancer L. 5
2-4
1d4
Death Riders

3-4
Hero L. 5
5-7
1d6
Skeleton Warriors

5
Hero L. 10
8-9
1d4
Grim Reapers

6
Hero L. 15
10-12
1d8
Zombies

7
Giant
7

Giants


Ogre L. 5
1
1
Giant

8
Hobgoblin
2-6
1d2
Ogre Merc

1-3
Hero L. 5
8

Hobgoblins

4-5
Hero L. 10
1
1d6
Mourngul Renegades

6
Hero L. 15
2-5
1d3
Hobyars


6
1
Hobhound Handlers